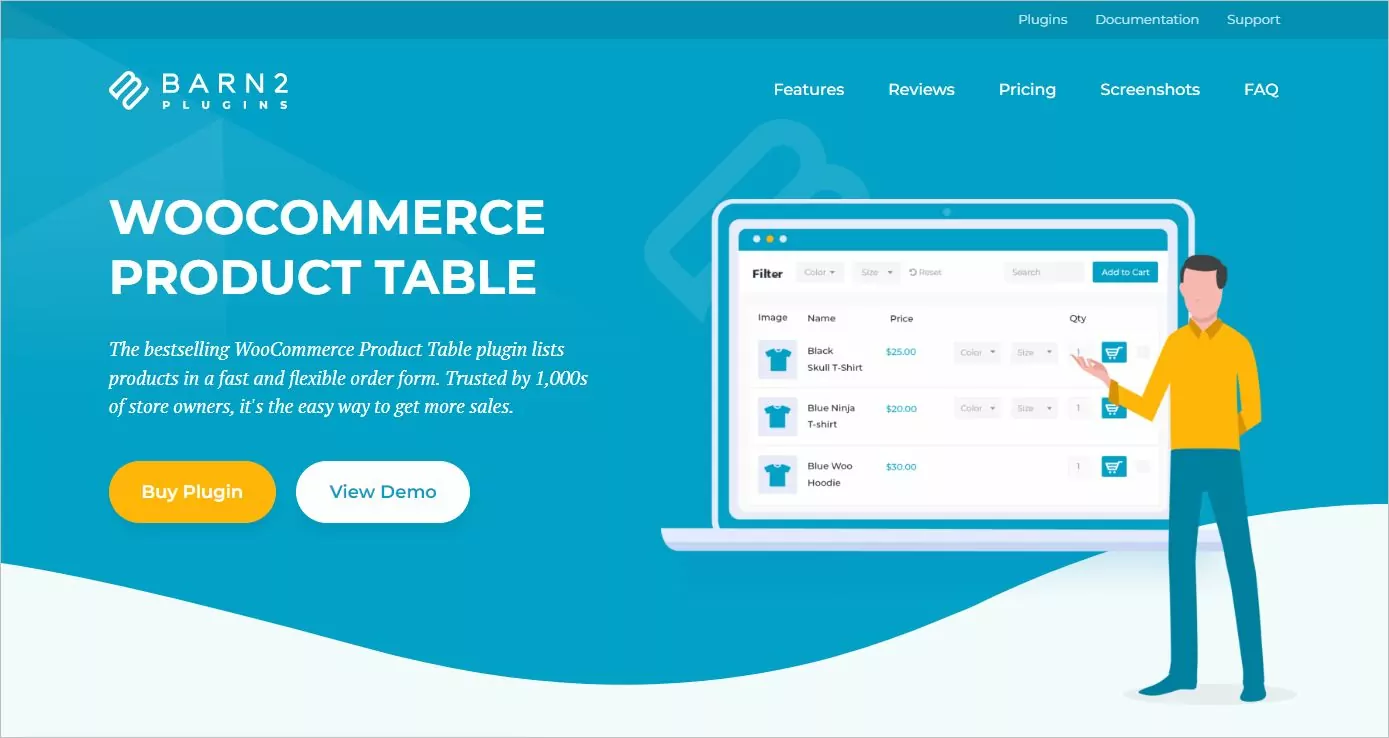
WooCommerce Product Table is a plugin by Barn2Media that helps you list WooCommerce products in filterable tables. In this tutorial we will use it together with TranslatePress to create a multilingual WooCommerce product table.
Related: How to Easily Translate WooCommerce Products [The Complete Guide]
Features of WooCommerce Product Table
- Instant filtering and sorting
- Filter products by attribute, price, or rating
- Customers choose the quantities and add the products directly to the cart (few clicks and more sales)
- Select multiple products at once and add them to the cart in bulk
- Exclude categories and products from listing
- Works best for bulk orders and wholesale stores.
We will set up WooCommerce Product Table by using a free theme optimized for WooCommerce online stores.
Next, we will install and activate TranslatePress to translate the product tables.
1. Install WooCommerce Product Table
Download the plugin from the official website and head to your WordPress admin dashboard.
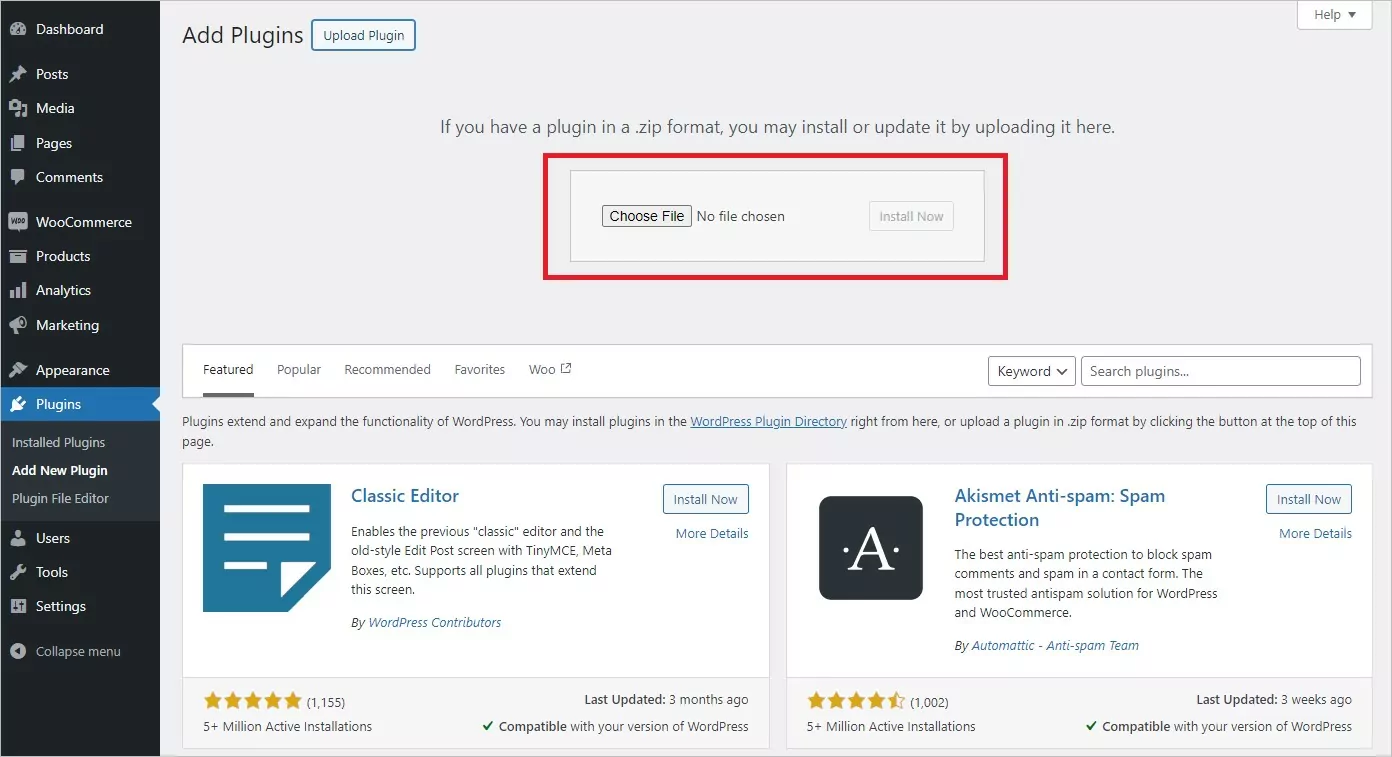
Go to Plugins > Add New and click on Upload Plugin button and Choose File button to upload the plugin. Install and activate it. To fully benefit from it, you have to have installed the WooCommerce plugin.
Depending on your preferences, you can upload WooCommerce Product Table via FTP.
2. Customize WooCommerce Product Table
Once installed, head to WooCommerce > Settings and click on Products in your WordPress admin dashboard. Next, go to the Product tables section to customize your table.
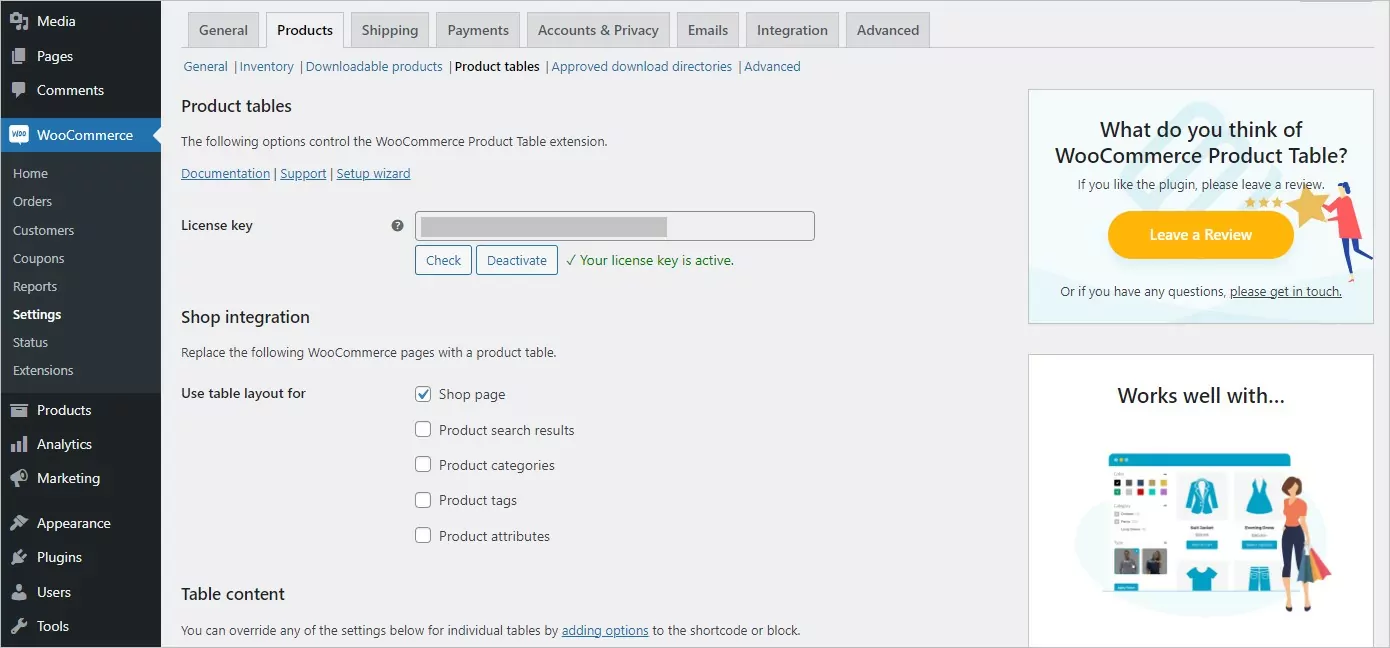
To speed up the learning process, I’m going to assume that you have already entered the license key and have at least four or five WooCommerce products added.
WooCommerce Product Table comes with a bunch of useful features. Users who want to add their personal touch can entirely change the table design.
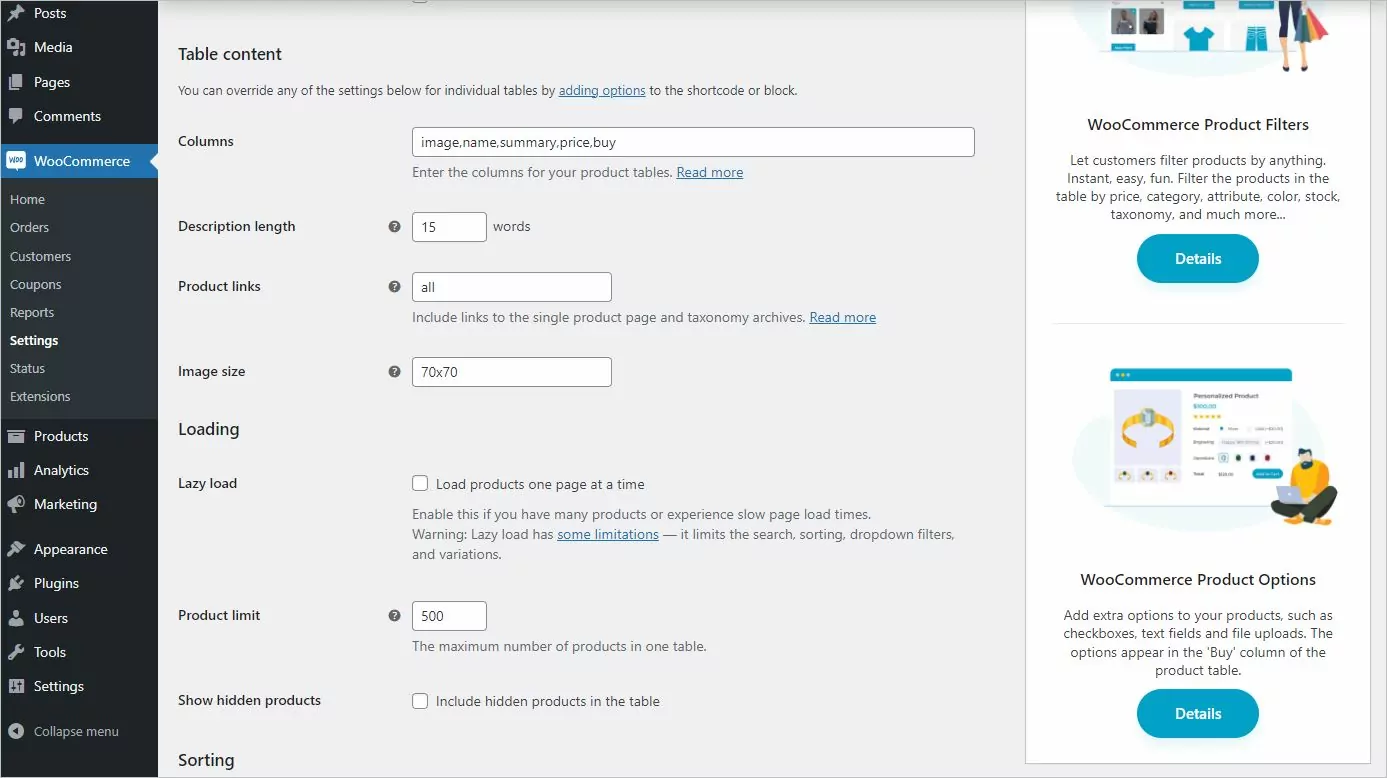
Users are also in full control of the product information displayed within the tables. For example, the number of columns, image size, and product descriptions are all customizable.
The Add to cart button and the table controls are tailorable to fit with the layout design.
3. Set Up the WooCommerce Product Table page
If you already have a Shop page created, you can use the Setup Wizard option from WooCommerce Product Table settings. Otherwise, you can go to Pages > Add New and create a new page (let’s say “Shop“). Then insert the [product_table] shorcode inside it.
Publish the page and you’ll notice it will display a filterable table of your products. You have created your own WooCommerce product table. Now, let’s proceed to translating it.
4. Install and Set Up TranslatePress
Go to Plugins > Add New and type in “TranslatePress” in the search form. Select, install, and activate it. Alternatively, go to WordPress repository, search for “TranslatePress,” download the plugin, and upload it on to your site.
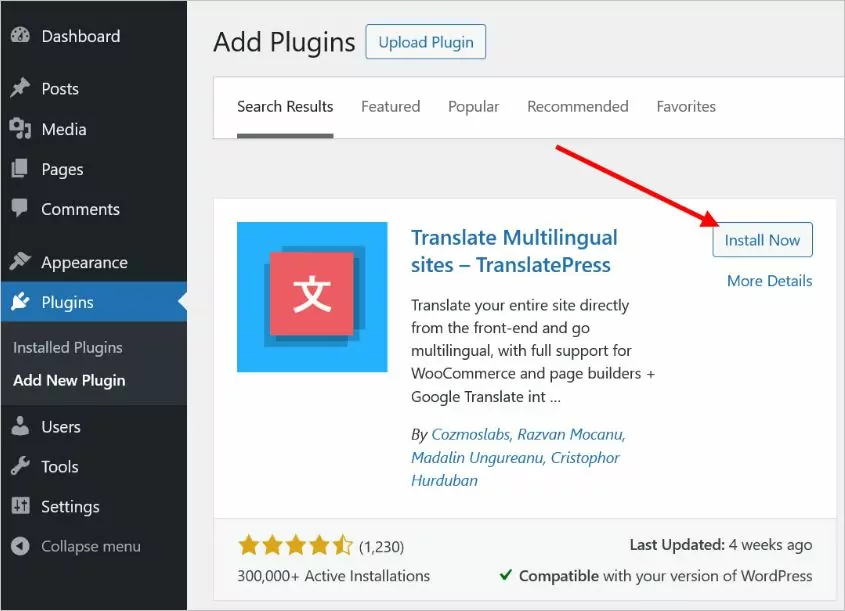
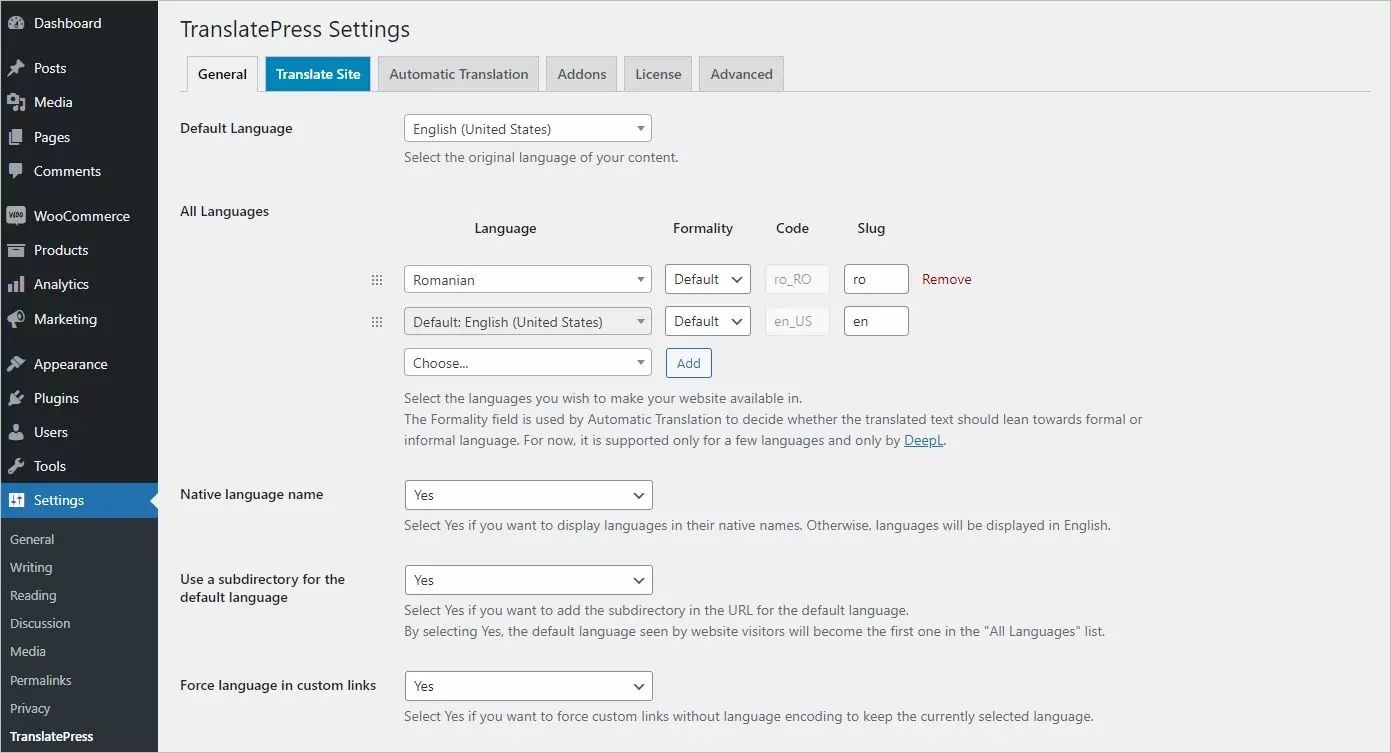
Next, go to Settings > TranslatePress to set up the plugin. First, select the default language—American English in our example—and the language you want to translate the content into—Romanian in our example. Second, personalize a few translation options, such as:
- Display languages in their native names or in English
- Use a directory for the default language
- Force language in custom links
- Enable or disable Google Translate (for automatic translation)
Third, customize the language switcher.
5. Translate WooCommerce Product Table
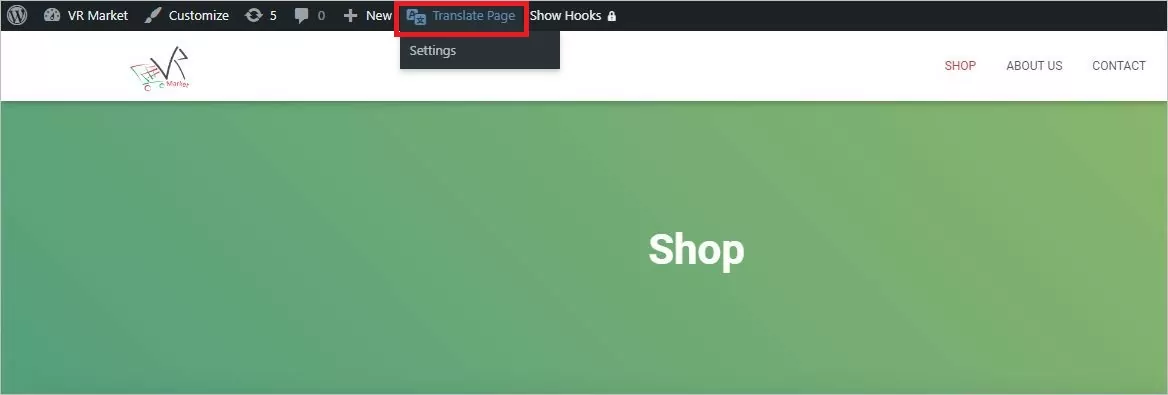
Hit the Translate Site button to effectively start translating the shop page. Alternatively, you can start translating by using the Translate Site button from the top admin bar.
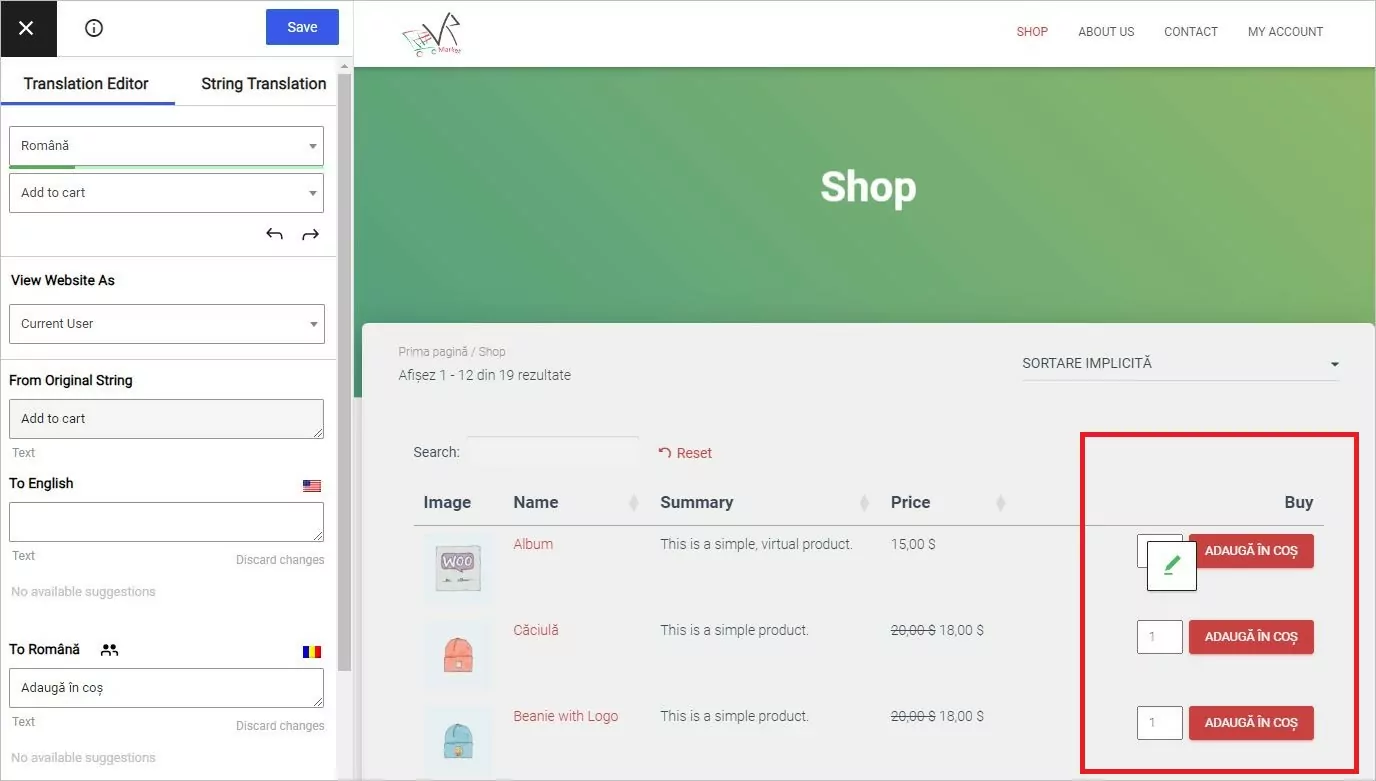
All you have to do is to hover over each string and translate it.
Blue icon strings are user-generated while green icon strings are gettext strings generated by theme or plugins.
Start translating the table by hovering over each product, summary, tag, price, and button. Hover over the word you want to translate, click the pencil icon and use the left sidebar to fill out the translation.
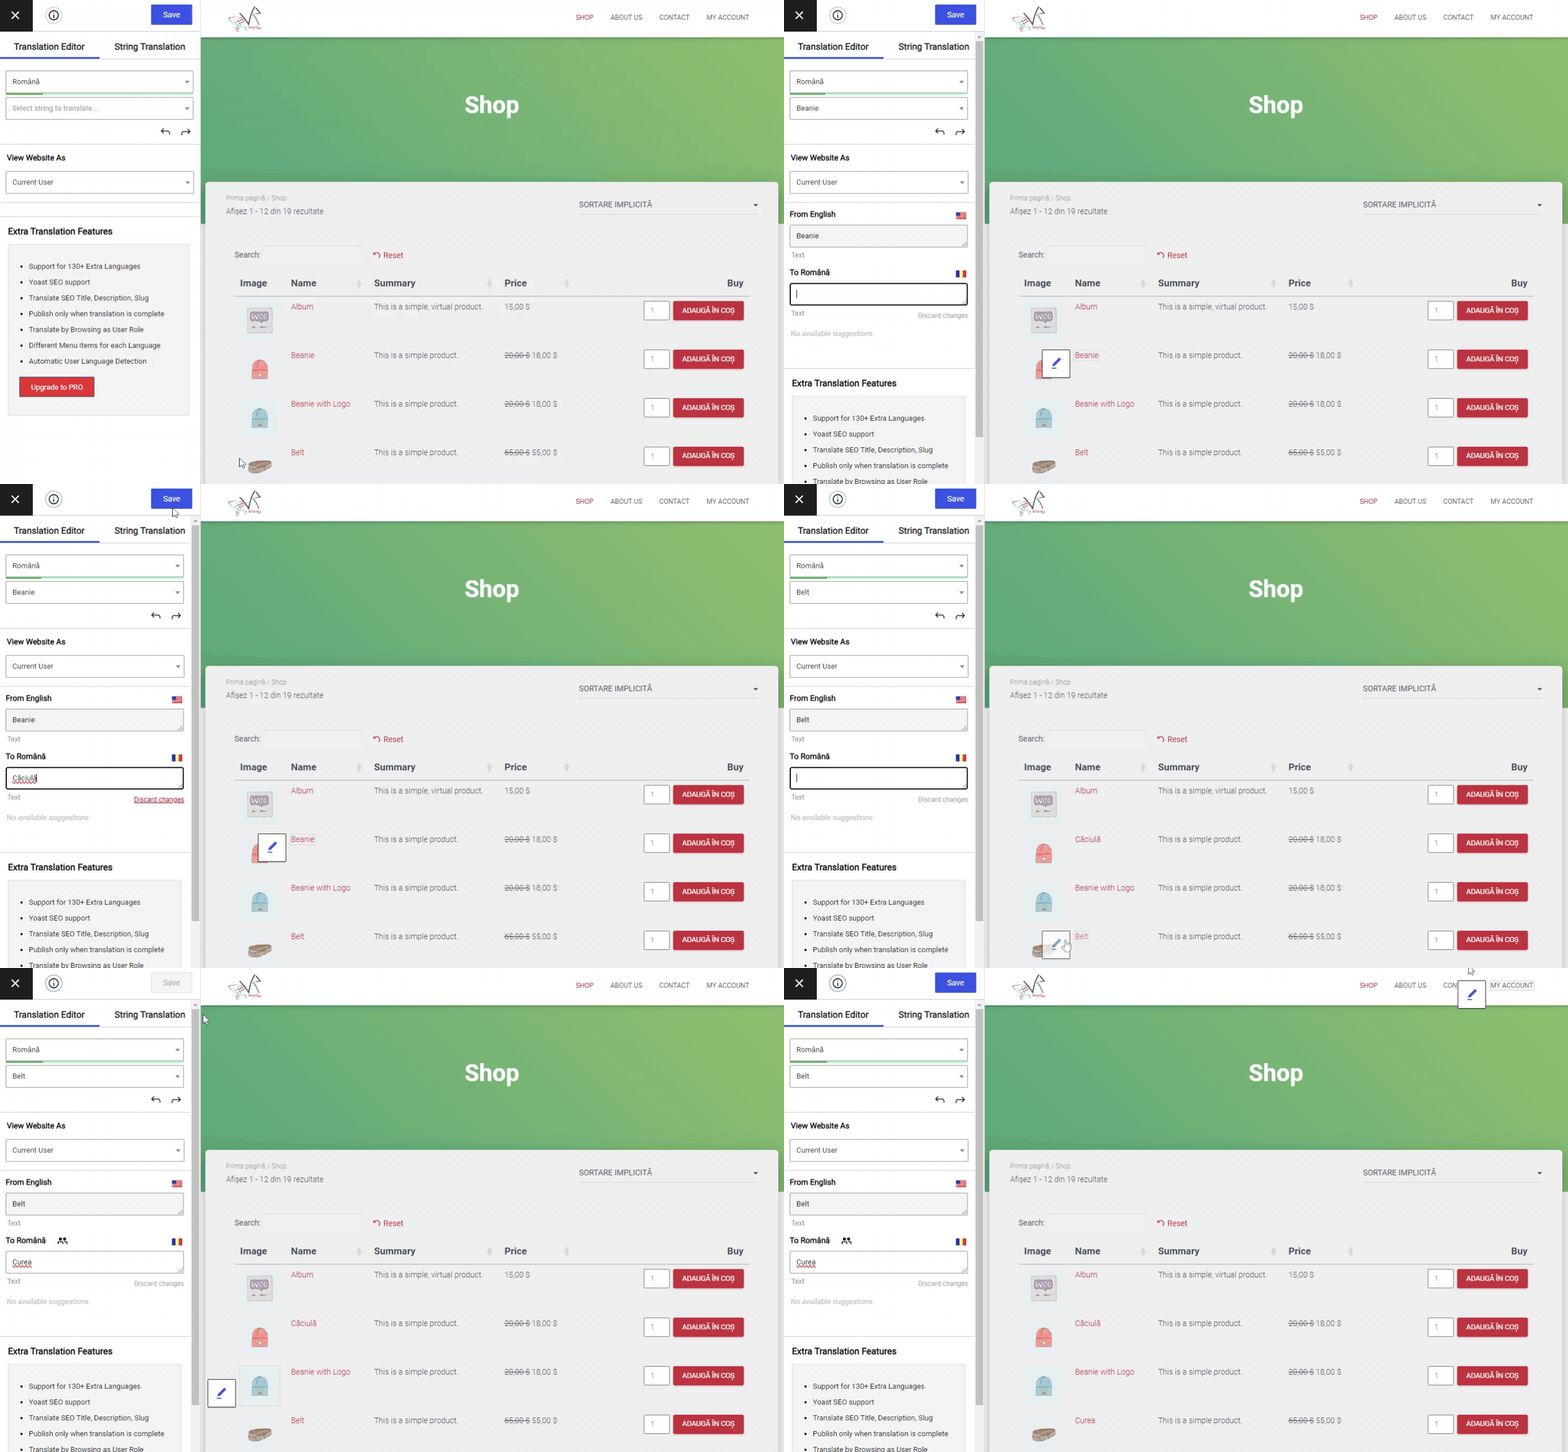
TranslatePress also allows you to translate the micro-copy of the buttons.
Next, go to the products names and description and repeat the same process. You can view the translated web page as the current editor by default, but you can switch to view it as a logged-out user. It’s that simple!
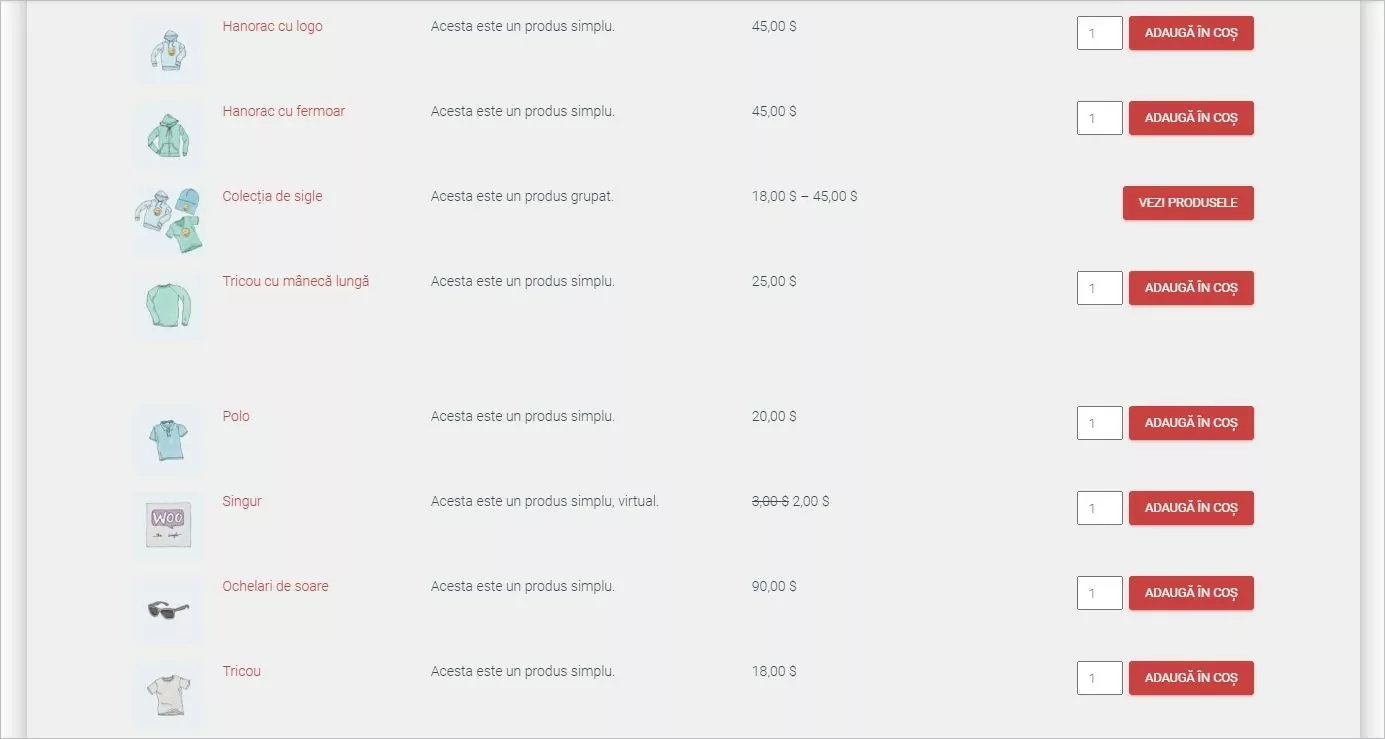
Translate the menu, and your first web page is fully translated! Save your translation and check the translated version by switching the language button.
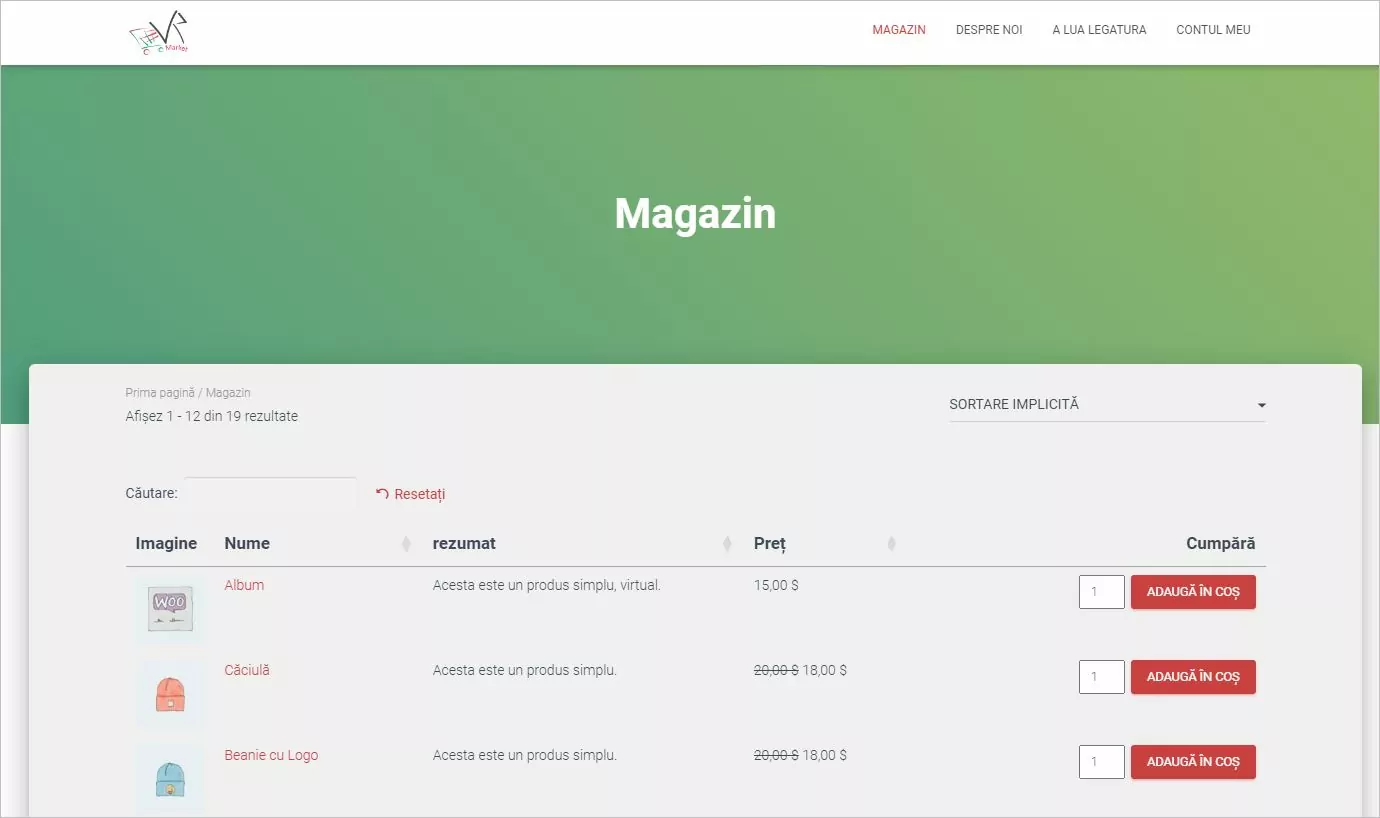
Follow the same steps to translate the entire website: go to each page, hit the Translate Site button from top admin bar, and translate the content. You can translate every type of content, including menus, forms, labels, buttons etc.
6. Adding a New Language
If you want to translate the site into other languages, start with adding a new one in the TranslatePress settings. You’ll need the Multiple Languages add-on for adding a third translation language.
Next, follow the same steps as with the first language to translate the text.
Conclusion
WooCommerce Product Table is a plugin aimed at better displaying the products within an online store. You can use together with TranslatePress to build multilingual product tables.
No matter the display options, the number of products, or the number of languages to translate the text into, TranslatePress can help you translate any product table built using WooCommerce Product Table.
Related: Creating a Multilingual WooCommerce Store [Ultimate Guide]

